How to get there
You can access the Optional Octave Region dialog box in two ways, depending on whether you need to add an octave marker or edit an existing one:
- Choose Utilities > SmartMusic Markers. The SmartMusic Markers dialog box appears.
- Select Optional Octave from the marker list on the left and click Add.
Or, select an existing optional octave marker from the Marker window and click Edit.
What it does
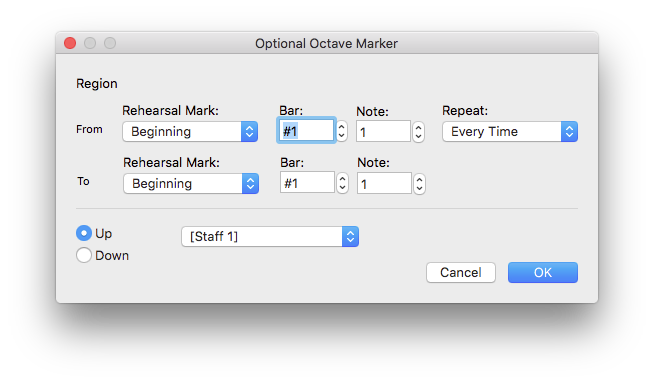
Add an Optional Octave SmartMusic Marker to specify a section where the soloist has the option to play up or down an octave. Use the settings in this dialog box to control the measure assignment for the Optional Octave SmartMusic Marker you are adding or editing. See SmartMusic Performance Markers.
- Rehearsal Mark • Bar • Note • Repeat. Choose a rehearsal mark, bar, and note in the From and To rows of options to define the region of the Optional Octave Marker. Use the Repeat
- Up • Down. Choose Up to recognize a performance that sounds an octave higher than written. Choose down to recognize a performance that sounds an octave lower than written.
- Staff
See also: